How-to set-up automatic Switch scanning in the PROFINET-INspektor®
A common practice with the PROFINET-INspektor® is to configure a scan of the Switch every so often; to do this, please follow these steps:
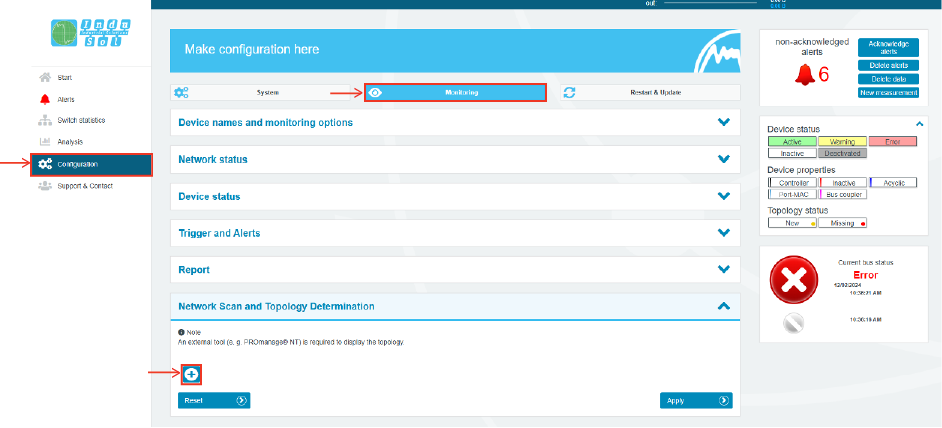
Step 1. Click on “Configuration” > “Monitoring” and then, in the “Network Scan and Topology Determination” section, click on the “+” symbol:
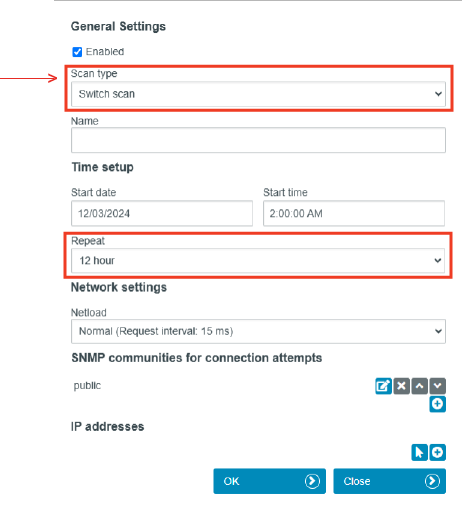
Step 2. A configuration window will open. Select “Switch Scan” in the “Scan Type” section. In the “Repeat” section, it is recommended that you define “12 hours". After that, click on the “+” symbol inside the “IP addresses.”
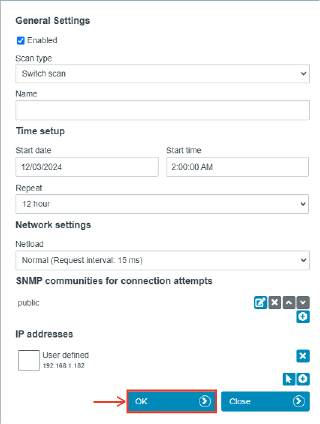
Step 3. The IP of the switch in question must be defined:

Step 4. Click on "OK".
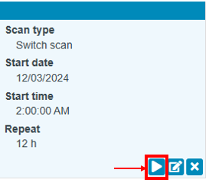
Step 5. Thanks to this, the PROFINET-INspektor® will scan every 12 hours. In case you want to perform a scan just after this, click on the "play" symbol.
Right after starting the scanning process, the following symbol will appear, which will be there until the scanning is finished.

The pertinent information produced by this scan will be displayed in the reports created by the PROFINET-INspektor®.
Keep learning:
PROFINET
PROFINET in the context of Industry 4.0What is PROFINET?
PROFINET Network Planning
ServiceTool
How to use the Indu-Sol ServiceTool to identify the IP of PROFINET devicesPROFINET-INspektor®
How to configure ports in the PROFINET-INspektor®How to set PLC as a master in the PROFINET-INspektor®
How to set-up automatic topology scanning in the PROFINET-INspektor®
How to get reports and alarms from the web interface of the PROFINET-INspektor®
How to make a manual snapshot in the PROFINET-INspektor®
PROFIBUS
What is PROFIBUS?How to troubleshoot PROFIBUS systems with the PROFIBUS Tester PB-Q ONE